Introduction to Paintbrush Use
Before diving into the world of house painting, it’s essential to understand the importance of proper paintbrush use. It’s not just about picking up a brush and applying paint to the walls; there’s a technique involved, which can significantly affect the outcome.
Understanding the Importance of Proper Paintbrush Use
Knowing how to properly hold and use a paintbrush is crucial in achieving a professional finish. A good grip allows for better control and precision, helping to avoid drips and uneven coverage. It also eases the painting process, making it more efficient and less tiring for the painter.
There’s no one-size-fits-all approach in painting; each task may require a different method or brush type. Whether you’re painting a large wall or a small window frame, the right technique can help accomplish the task more effectively. For tips on more specific painting tasks, you can refer to our step-by-step guides like how to properly prep a room for painting and step-by-step guide to painting windows and divided lights.
Different Types of Paintbrushes and Their Uses
There are various types of paintbrushes, each designed for a specific purpose or paint type. Understanding the differences can help you select the right tool for your painting project.
- Wall Brushes: These brushes are wide and flat, making them ideal for painting large, flat surfaces. They are perfect for applying paint over large wall areas.
- Trim Brushes: These are smaller brushes with a straight edge, designed for painting trims, moldings, and smaller areas that require more precision.
- Sash Brushes: These brushes have slanted bristles and are used for cutting in precise edges around window frames and other detailed work.
- Stencil Brushes: These are special brushes with a round, flat tip, used for dabbing paint through a stencil without getting paint under the edges.
Remember that the type of brush also depends on the kind of paint you’re using. For instance, natural bristle brushes work well with oil-based paint, while synthetic brushes are best for water-based or latex paint. You can learn more about this in our article choosing the right house paint: oil vs. latex.
By understanding the basics of paintbrush use, homeowners can ensure that their DIY painting projects or their collaboration with professional house painters yield the best results.
How to Hold a Paintbrush
Learning how to properly hold and use a paintbrush is a fundamental skill in painting, whether you’re a DIY enthusiast or a professional painter. This mastery will ensure optimal control, comfort, and adaptability in your brush strokes.
Correct Positioning for Optimal Control
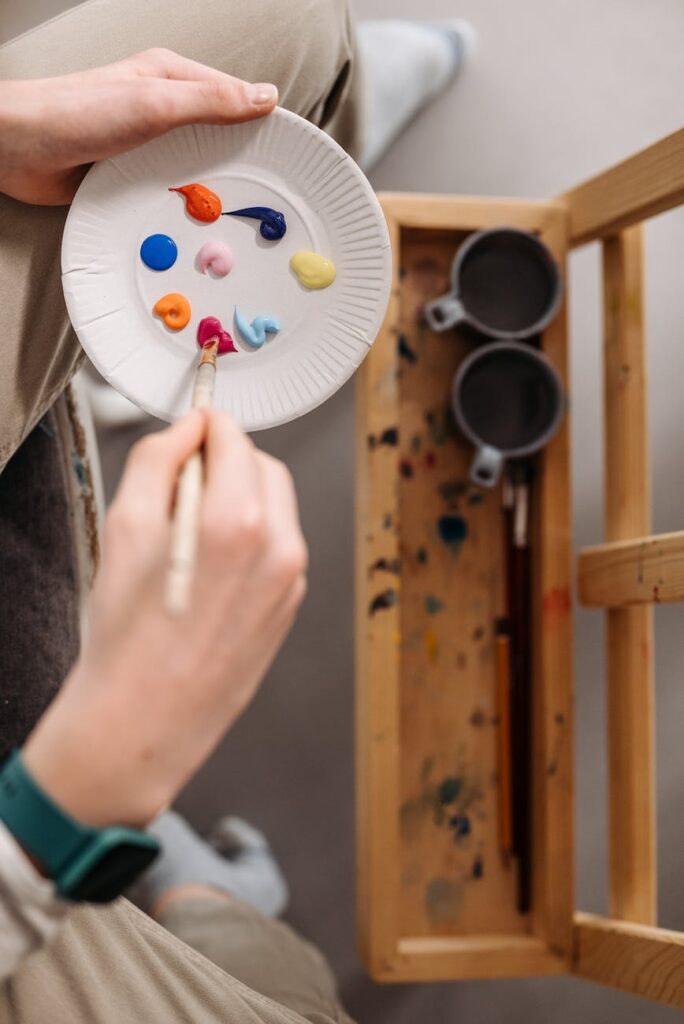
To gain optimal control over a paintbrush, the positioning of your hand plays a pivotal role. The paintbrush should be held similar to how one holds a pencil for writing. The handle of the brush rests in between your thumb and index finger, while the rest of your fingers support the handle from beneath. This grip gives you the ability to make precise movements and control the pressure applied to the brush.
Grip Strength and Comfort
The strength of your grip on the paintbrush significantly influences the outcome of your strokes. A grip that’s too tight can lead to fatigue and strain, resulting in uneven and shaky lines. Conversely, a grip too loose can lead to lack of control and precision.
The key is to maintain a grip that’s firm enough to control the brush, yet relaxed enough to move smoothly. Remember that your fingers should guide the brush, and the pressure should be controlled by your arm and shoulder movements.
Adjusting Your Grip for Different Strokes
As you progress in your painting project, you’ll find that different strokes require different grips. For wider, broader strokes, hold the brush towards the back of the handle. This allows for more brush flexibility and larger coverage.
For smaller, detailed strokes, hold the brush close to the bristles. This provides precision, control, and reduces the chance of stray bristle movements.
Understanding how to switch between these grips seamlessly can significantly enhance your painting skills. Practice these techniques to become more familiar with the brush, and soon you’ll be painting like a pro!
While mastering these techniques can elevate your DIY painting projects, there’s no replacement for professional expertise. If you’re considering house painting services for your home in Dublin, ensure to choose those who understand and apply these professional standards in their work.
Using the Paintbrush
Once you’ve mastered how to properly hold the paintbrush, it’s time to delve into the application process. This involves loading the paintbrush with paint, applying the paint to the surface, and using effective techniques for smooth and even coverage.
Loading the Paintbrush with Paint
When it comes to loading the paintbrush with paint, the primary goal is to get enough paint on the brush without overloading it. Dip the brush into the paint, letting the bristles get covered up to half their length. Then, gently tap the brush against the sides of the paint can to remove excess. This step helps to prevent paint drips and spills.
Applying Paint to the Surface
Applying paint to the surface requires a steady and controlled motion. Start by placing the brush at an angle against the surface and then smoothly glide it along. The ideal method is to paint in long, even strokes. Try to maintain the same pressure throughout the stroke to ensure uniform coverage.
Remember to reload your brush when necessary. If you find the brush dragging or leaving a streaky finish, it’s a sign that you need more paint.
Techniques for Smooth and Even Coverage
Achieving smooth and even coverage is crucial for a professional-looking finish. Here are a few techniques to help you achieve this:
- Crosshatching: This involves painting the surface with a series of overlapping X strokes. Start in one corner and work your way across the surface. This technique helps to ensure comprehensive coverage and eliminates visible brush strokes.
- Feathering: Feathering is a technique used to blend the edges of your paint strokes. This is especially useful when working with multiple colors or when you need to take a break and start again later.
- Tip-off: After applying the paint, lightly drag the tips of the bristles over the freshly painted area. This technique helps to smooth out the paint and eliminate brush lines.
- Two-coat application: For the best finish, apply two coats of paint. Allow the first coat to dry completely before applying the second. This helps to ensure full coverage and a rich, consistent color.
Remember, practice makes perfect. The more you use these techniques, the more comfortable you’ll become, and the better your results will be. For more tips on achieving a professional finish, check out our article on rolling a wall: tips for smooth, even coverage.
Tips and Tricks for Using a Paintbrush
Mastering the art of using a paintbrush for home painting projects can make the difference between a DIY disaster and a polished, professional finish. Here are some useful tips and tricks to prevent drips and spills, achieve a professional finish, and maintain your paintbrush.
Preventing Drips and Spills
Preventing drips and spills is crucial for a clean and professional-looking paint job. Start by not overloading your brush with paint. Dip only a third of the bristle length into the paint and tap the brush against the side of the can or bucket to remove excess paint.
When painting, hold the brush at an angle and apply paint with smooth, even strokes. Avoid painting too quickly or forcefully, as this can cause paint to splatter.
Using a paint tray or a smaller container can help control the amount of paint on your brush. Also, consider laying a drop cloth or newspaper on the floor to catch any drips or spills.
Achieving a Professional Finish
Achieving a professional finish requires patience and attention to detail. Begin by properly preparing the surface. Clean walls, sand rough spots, and patch any holes or cracks. Visit our guide on how to properly prep a room for painting for more information.
When painting, use long, even strokes and try to keep the edge of the paint wet to avoid visible lines or streaks. If you’re painting a large area, consider using a roller for the majority of the surface and a brush for details and edges. Check out our article on rolling a wall: tips for smooth, even coverage for tips.
Maintenance and Care of Your Paintbrush
Proper care and maintenance of your paintbrush can extend its lifespan and ensure good results for future painting projects. After painting, clean your brushes thoroughly with water for water-based paints or mineral spirits for oil-based paints. Avoid soaking brushes as this can damage the bristles.
Once clean, use your fingers to reshape the bristles and let the brush dry horizontally on a flat surface. Store brushes in their original packaging or hang them up to maintain their shape.
By following these tips, you can achieve a professional finish when painting, extend the life of your paintbrush, and make your DIY painting project a success. For more guidance, consider exploring our house painting services or reading more articles on home painting.
Common Mistakes and How to Avoid Them
Proper paintbrush use is a key aspect of achieving professional quality results in any painting project. However, there are common mistakes that can hamper the quality of your work. In this section, we’ll explore these errors and provide solutions on how to prevent them.
Overloading the Brush with Paint
One of the most common mistakes that individuals make when painting is overloading the brush with paint. This not only leads to an uneven application but also causes drips and makes it difficult to control the brush.
To avoid overloading the brush with paint, dip only a third of the bristle length into the paint. Then, tap the brush against the sides of the paint can to remove excess paint. This technique helps to ensure a smooth, even application and greater control over the brush. For more tips on how to load a paintbrush with paint, visit our house painting services page.
Incorrect Brush Angles
Using incorrect brush angles can also affect the quality of your paint job. The angle at which you hold the brush can make a significant difference to your control over the brush and the smoothness of the paint application.
As a general rule, hold the brush at an angle of about 45 degrees when painting. This allows you to apply the paint evenly without causing brush marks or streaks. For more information on correct brush angles, check out our article on how to properly hold and use a paintbrush.
Poor Brush Maintenance Practices
Poor brush maintenance practices can lead to a reduced lifespan of your paintbrush and lower quality paint job. It’s important to clean your brush thoroughly after each use and store it properly to maintain its condition.
To clean your brush, rinse it with water until the water runs clear. Then, use a brush comb to remove any remaining paint and straighten the bristles. Allow the brush to dry completely before storing it. For more tips on paintbrush maintenance, read our article on house painting services.
By avoiding these common mistakes, you can ensure a smoother painting process and achieve a professional-quality finish. Remember, proper paintbrush use and maintenance are key to successful painting projects.